Looking for a way to ramp up your ecommerce business? Pay-Per-Click (PPC) campaigns are a great way to promote your brand and generate online sales. When it comes to PPC, Google Ads is a fantastic place to start because it provides you with plenty of options to really target your potential customers.
Whether you’re a master marketer or new at the game, building out a campaign can be stressful. Below, we have created easy-to-follow, step-by-step instructions for creating a PPC campaign on Google Ads. Before getting started, check out this blog for some important items to consider before running a PPC ad.
Step 1: Creating A New Campaign
Log into your Google Ads account. On the left tab, click All Campaigns > Overview > New Campaign.

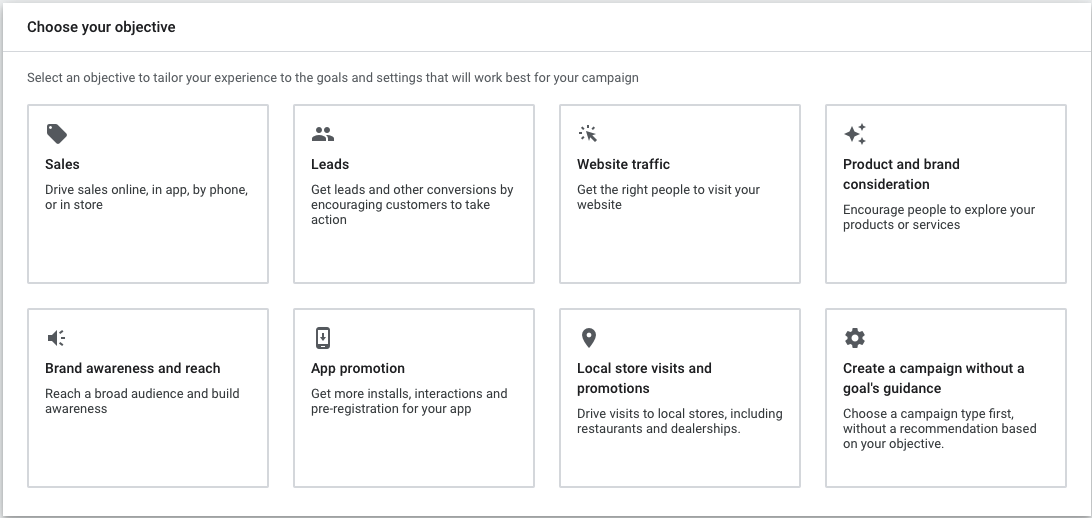
Then, select your campaign objective.
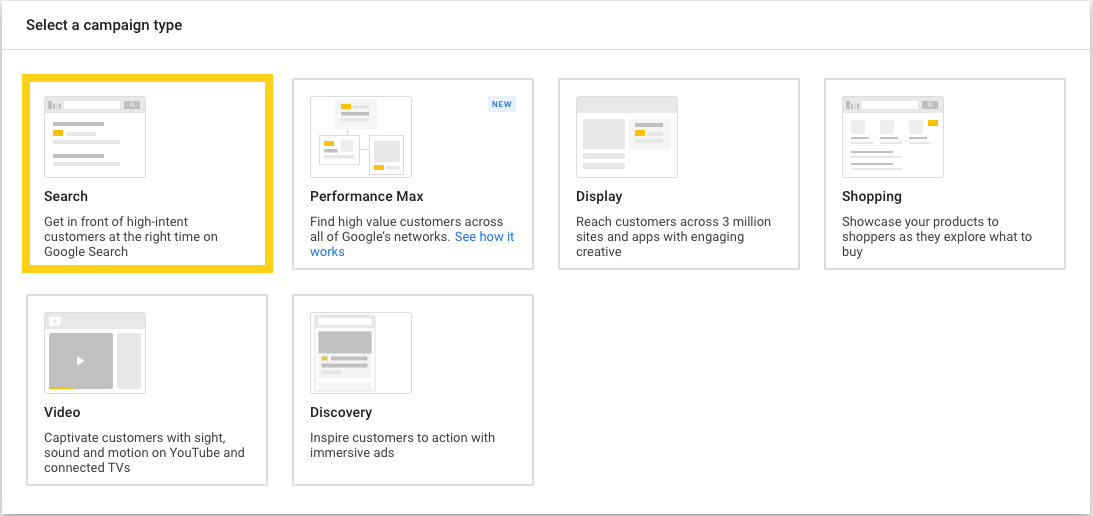
Next, select the campaign type. For PPC campaigns, you will be selecting the “Search” option.
You will then be prompted to select the ways you’d like to reach your goal (you can select more than one of these).
Afterwards, you will create a conversion action. You will need to install your conversion tracking tag by emailing it to your webmaster or installing the code yourself on your webpage.
Finally, you will name your campaign.
Step 2: Budget And Bidding
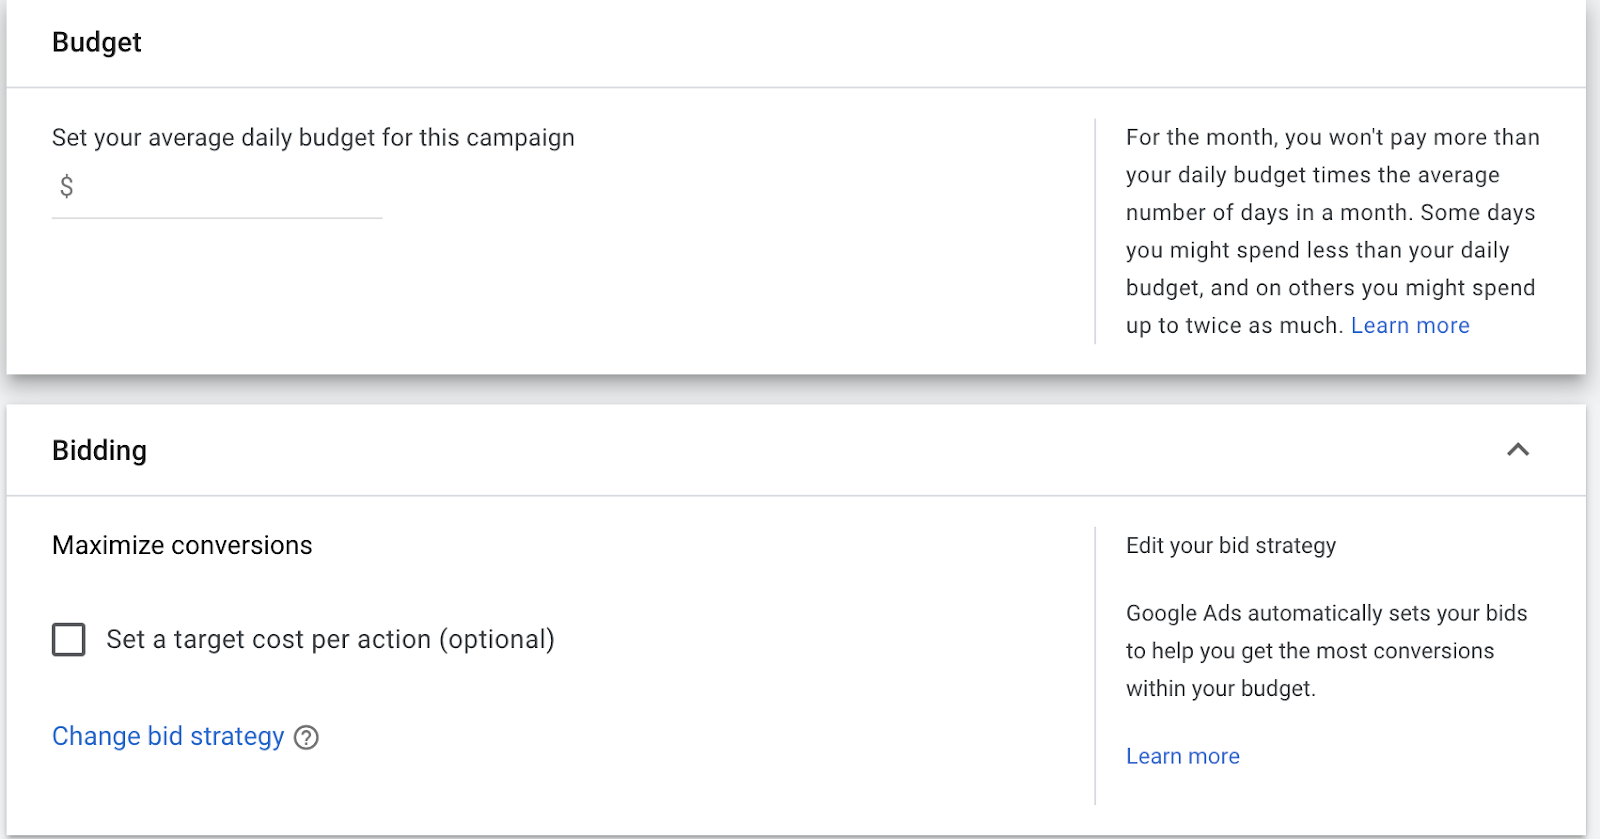
This point in the setup process is where you will need to choose your budget and bidding strategy. Budget is the amount you want to spend on each campaign per day, while bid is the amount you’re willing to spend on a keyword if someone searches for that term and then clicks on your ad.
When setting your average daily budget, it is helpful to remember that you may be spending less or more than your budget due to campaign activity. For the month, you will not pay more than your daily budget times the average number of days in a month. Doing industry research prior to setting your budget can help you understand the amount of money you will need to spend to rank on Google. Some industries have a higher Cost-Per-Click (CPC) than others, leading to a higher budget allocation.
Google has three overall sections to bidding strategy: recommended, manual, and automated. You also have a choice to use a portfolio strategy. All strategies allow you to set a target cost per action as well.
Step 3: Campaign Settings
At this point in the setup process, Google gives you the option to advertise on additional networks. You can choose to have your campaigns shown on the Google Search Network and Google Display Network, which means that your ads will include Google and their search partners.
- Google Search Network includes Google search pages and other Google sites like Maps and Shopping, as well as search sites that partner with Google to show ads.
- Google Display Network includes YouTube, Blogger, Gmail, and thousands of partnering websites across the internet.
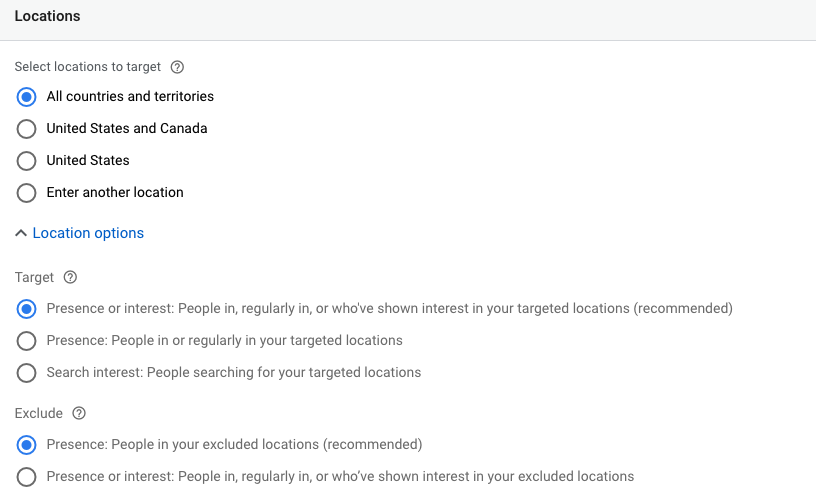
You will then choose the locations for which your campaign will run. Initially, you have a few options to target, but you can further narrow them down later in the process if needed. You also have choices on who to target and who to exclude in this section. After choosing the location, you will be asked to choose the language(s) that your customers speak, audience segments, dynamic search ads settings, campaign start and end dates, ad schedule, and campaign URL options.
Step 4: Keywords and Ads
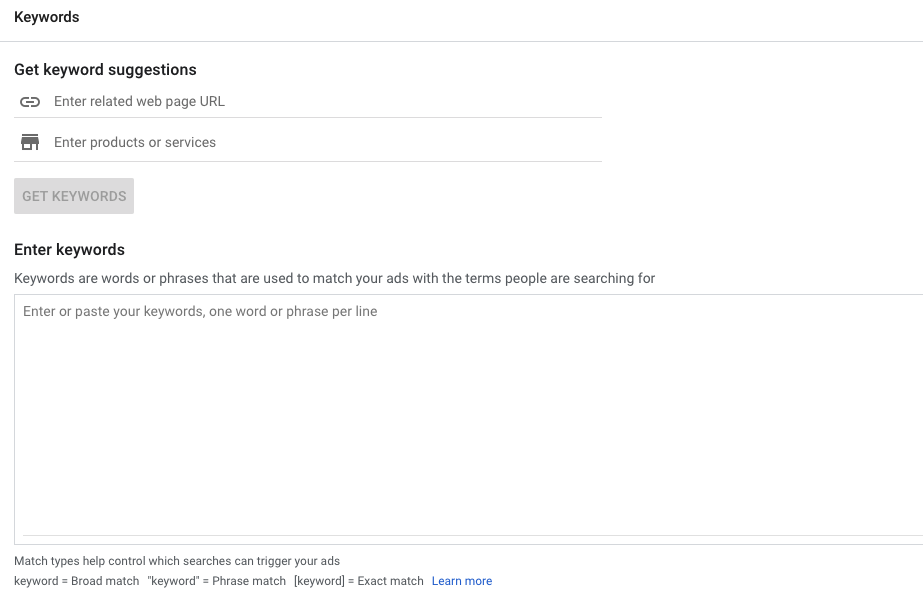
This is where you create your first ad group, which are individual groups within a campaign. These ad groups have their own keywords and ad copy and can be used to promote different products or services.
A keyword is what a customer types in to trigger your ads. Bidding on the correct keywords will allow your ads to show up in search. You can enter your website URL, a related website URL, or the products and services you sell to get keyword suggestions. You are also able to enter keywords manually using match types (broad match, phrase match, and exact match). Performing keyword research beforehand can allow you to save money by picking the correct keywords for your campaign.
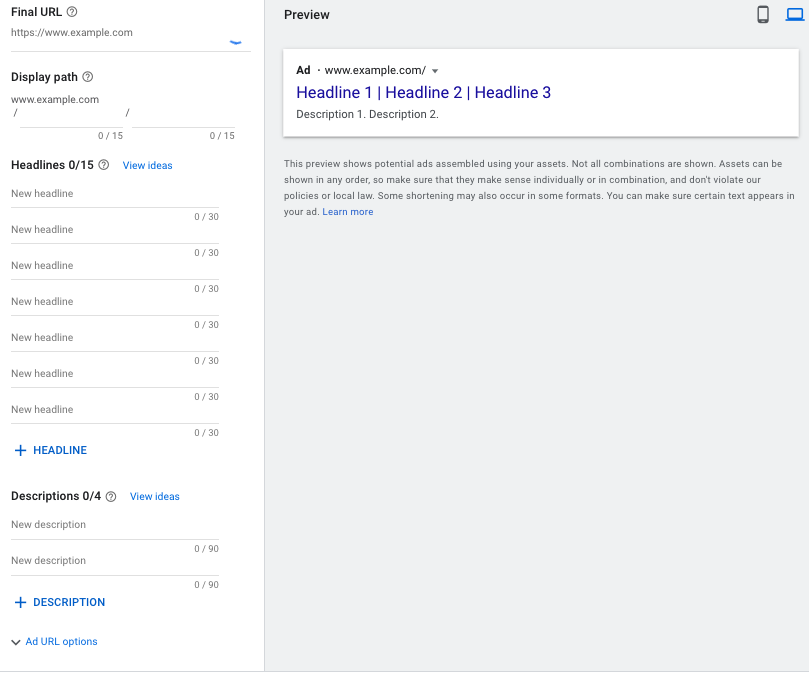
Google will prompt you to create a responsive search ad because you will no longer be able to create or edit expanded text ads starting June 30, 2022. Responsive search ads allow for different combinations of headlines and descriptions. You can create up to 15 headlines and 4 descriptions that Google will switch out depending on which is working the best and which keyword was entered into the search bar. If you want specific headlines or descriptions in certain places in the ad, you are able to pin them into a spot.
The final URL would be the landing pages that the ad leads to. The display path is vanity only and does not affect the URL. Ad copy is essential as it will trigger a customer to click on the ad—check out this blog post for information on how to write effective PPC ads.
Step 5: Extensions
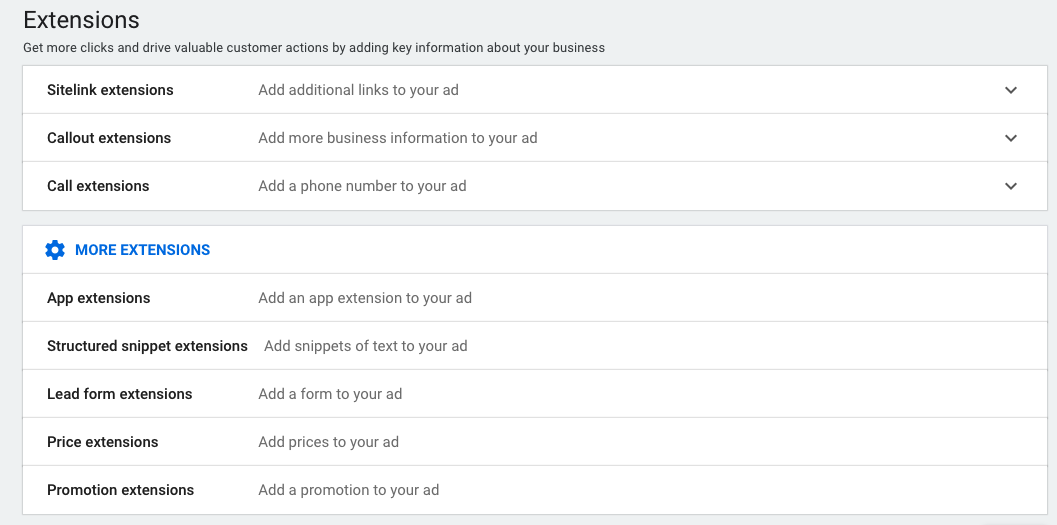
Extensions give your ad more real estate on the Google homepage. Creating extensions allow you to give key information about your business or product. Your extensions can be specific to a campaign or an ad group. It is best to add as many extensions as possible, as it will give your ad greater visibility on the search page.
Step 6: Review
Congratulations—you’ve created your first PPC campaign! The last step is to review the options you have chosen. Remember that you are able to change anything you’d like or add more information down the line if you change your mind about anything. Once you’ve reviewed and are happy with what you’ve got, you’re ready to run your campaign.
Managing your PPC campaign can be time-consuming. If you’d like someone with expertise on the matter to provide assistance, consider hiring a specialist to do the heavy lifting for you.


