Google Shopping ads are a great way to showcase your products and increase traffic to your site, giving merchants an opportunity to appear on Search Engine Results Pages (SERPs) based on their product data. However, those new to ads may be overwhelmed by the prospect of creating an effective strategy. Below, we dive into Shopping Ads and how to set up your first campaign.
What are Shopping Ads?
When it comes to traditional text ads, ad auctions determine which ad appears based on who is bidding what amount on keywords that the search query is relevant towards. With product listing ads in a Google Shopping Campaign, however, a merchant is able to gain more visual real estate that directly links to whatever is being advertised.
So what exactly are shopping ads like? Check out this example for the search query “clothes for dogs:”
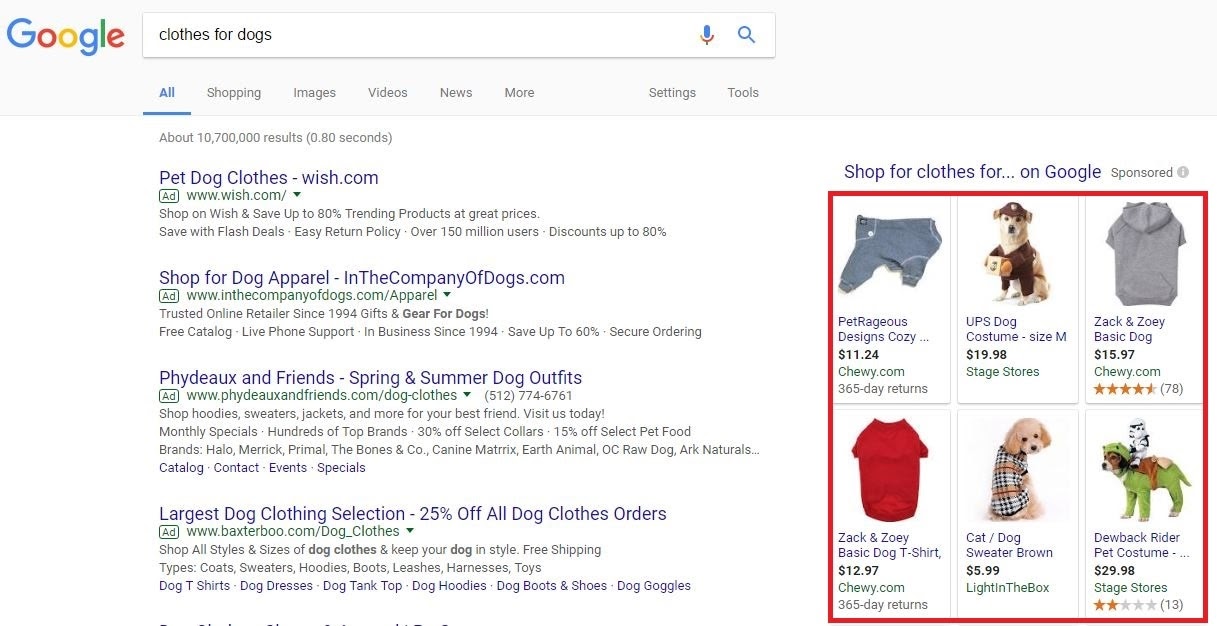
On the right-hand side of this SERP are shopping ads, outlined in red. Each contains a picture of the product being advertised as well as its title, price, and store URL. It is also possible for businesses to provide further information, such as return policy or product reviews. Being able to provide specific product information is the biggest strength of Shopping campaigns, as shoppers who click on these ads are highly interested in purchasing.
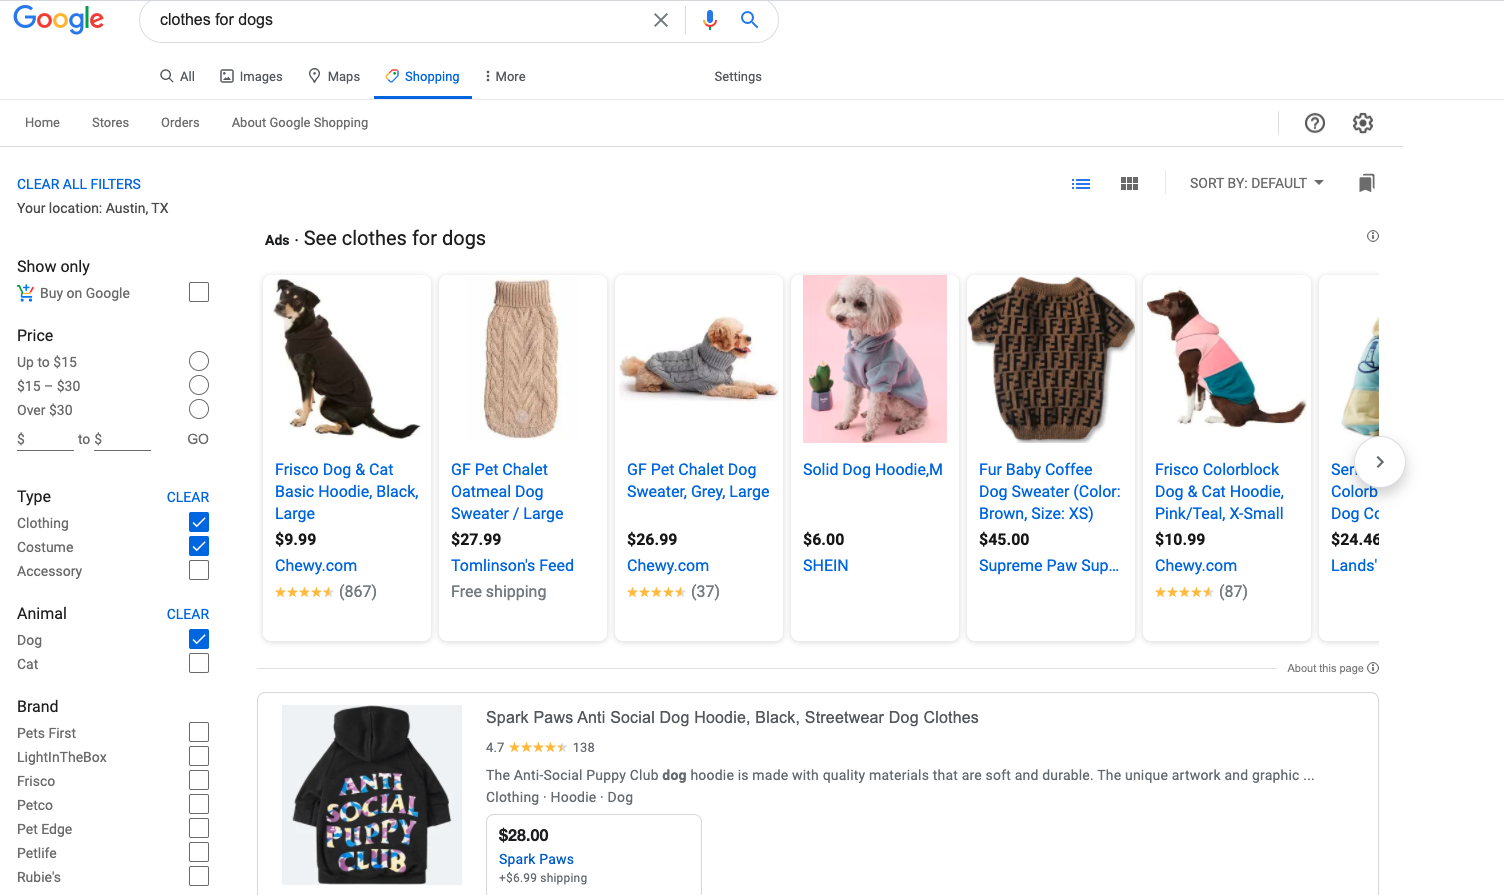
Shopping ads also have their own tab on a SERP. Clicking on this tab allows users to see even more results, which can be further filtered by factors like price, category, or brand.
Getting Started
Before you begin setting up your ad, you must ensure that you have uploaded your inventory into the Google Merchant Center in a data feed file. Some ecommerce platforms like Volusion offer a Merchant Center integration to help, but you can also look into creating a feed manually or using a third party solution. The information you provide in your shopping feed must be thorough and align with Google’s product data specifications and general shopping policies.
Product data is vital in Google’s determination of which search queries are relevant to which products. At initial upload, Google may take a few days to crawl through your feed and either approve or disapprove your products. The Google Merchant Center is a great way to see any issues with your product information at a glance and address product information that is missing and could assist in the categorization of your product on the shopping network.

Google Ads Setup
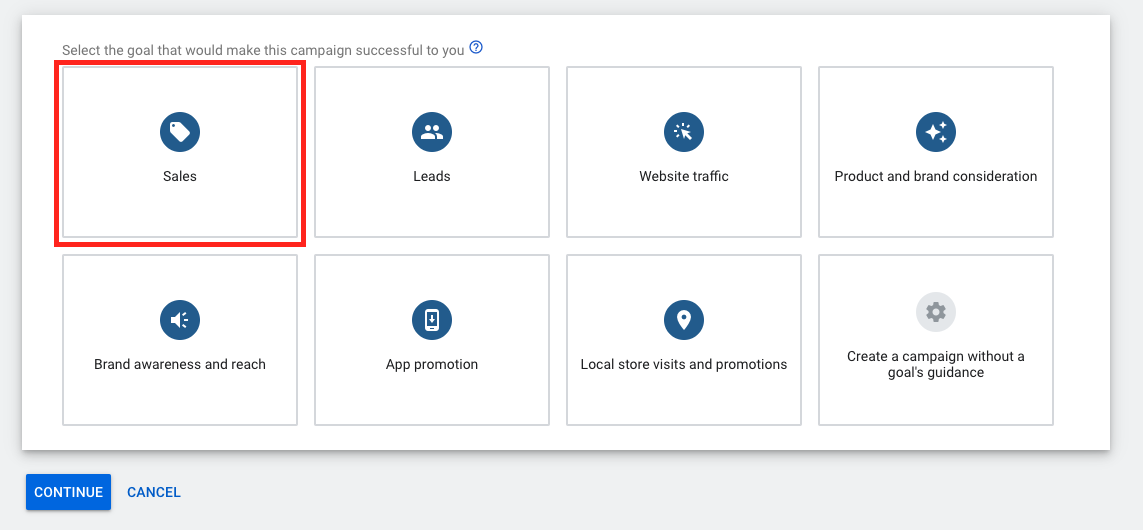
Once your shopping feed is set up, you can get started creating your Google Shopping Campaign. To create a new campaign, find the “Campaigns” tab on your Google Ads interface. Select a goal for your campaign, then select “Shopping” from the campaigns dropdown.
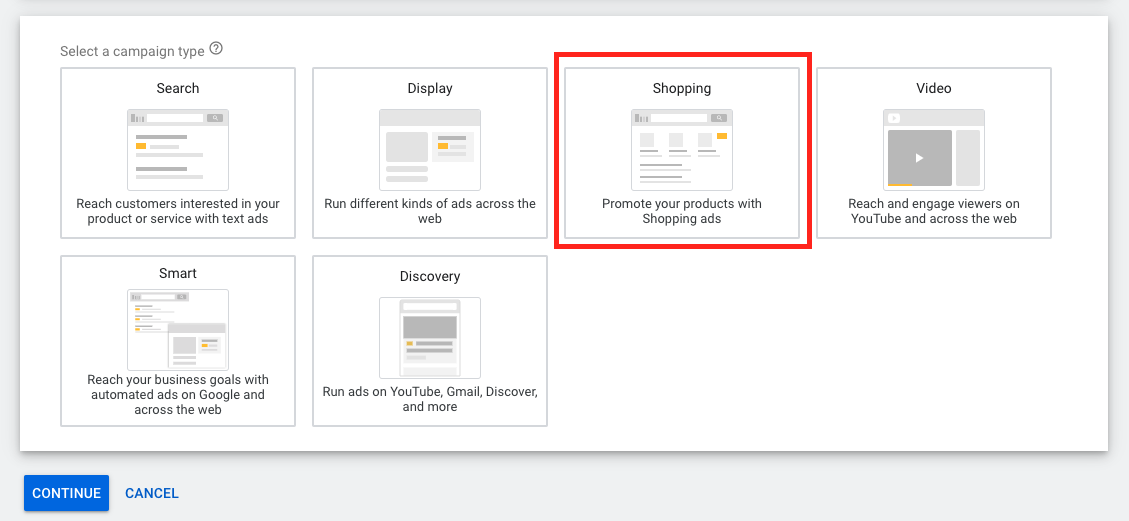
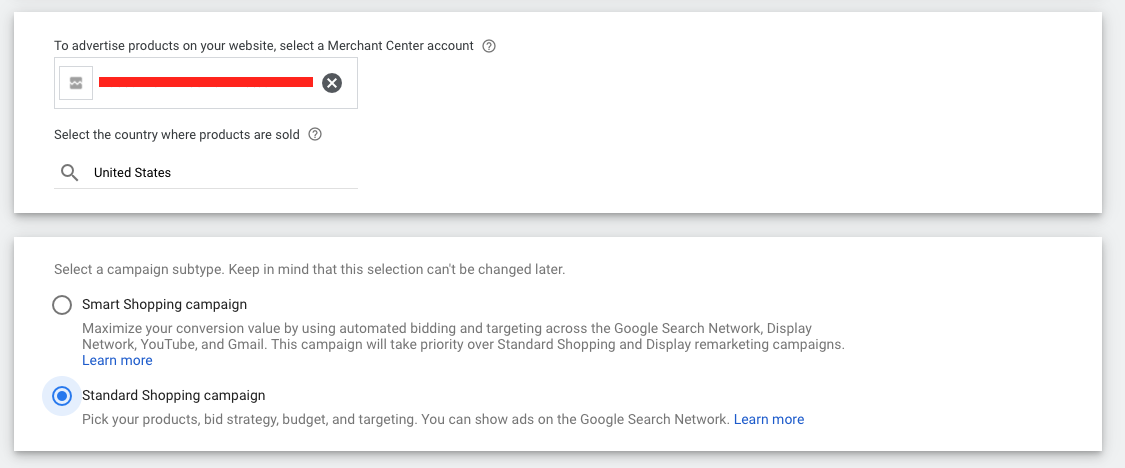
In the next section, you will choose your Google Merchant Center account and dropdown with your chosen “Country of sale.” Keep in mind that if you have yet to link your Google Merchant Center with your Google Ads account, this portion will include information on how to sync your two accounts. Underneath that section, you will be given the option to choose the type of campaign you want to run.
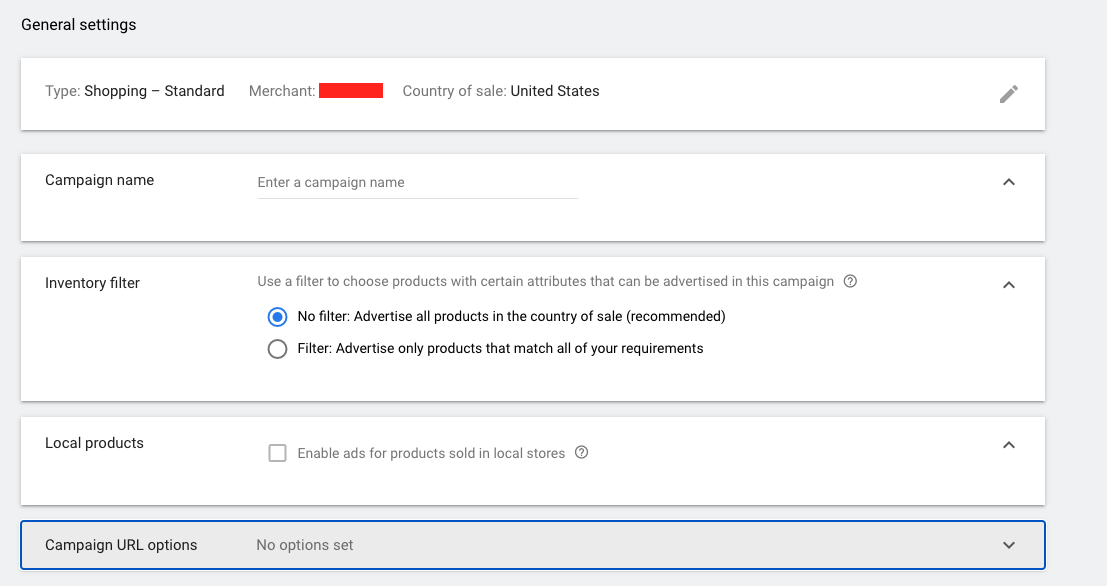
The next page is where you will be able to name your campaign. The “General settings” section will give you the option to enable local products, which are for brick-and-mortar retailers who want to promote their products sold in physical stores.
First, pick a bidding strategy. Google offers a variety of automated bidding strategies, as well as manual bidding if you're able to devote the time for a more hands-on approach. Next, it’s time to set your daily budget, which is how much you want to spend each day. To calculate your daily budget, determine what you want to spend in a month and divide that by the average amount of days in a month.
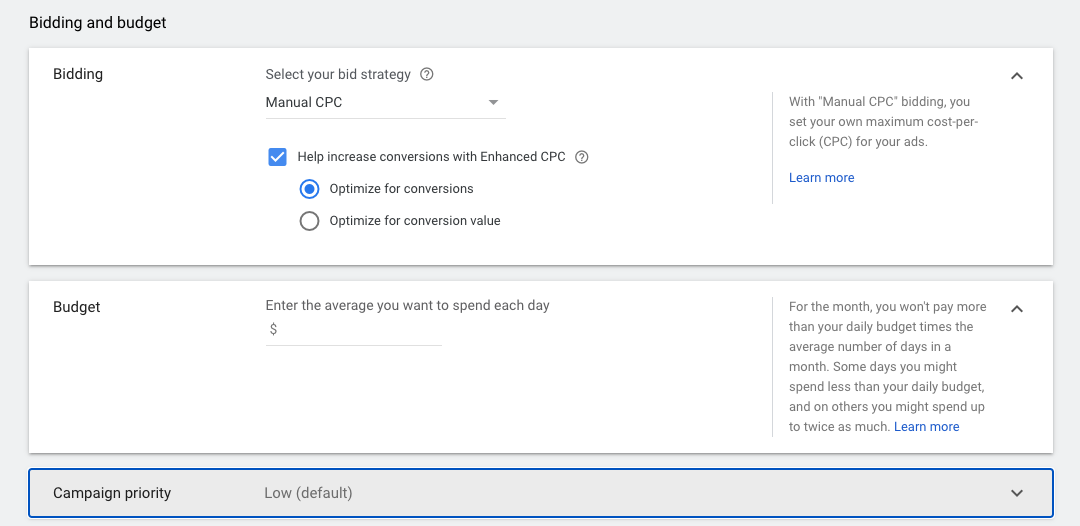
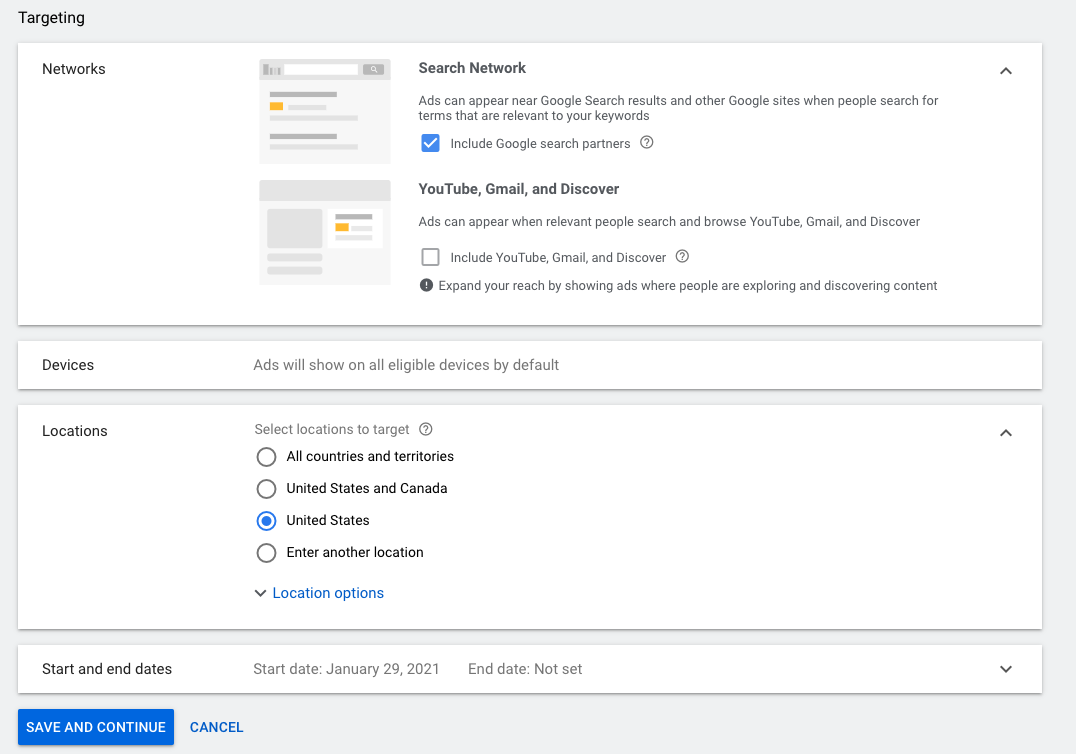
Then, choose your targeting options. You can leave both boxes checked; however, if you want your campaign to be more efficient, we recommend unchecking the Google Search Partners box as well as the YouTube, Gmail, and Discover box. If you do want more reach for your campaign, then you should keep those boxes checked. Quick note: You can always go back and change the settings at a later date.
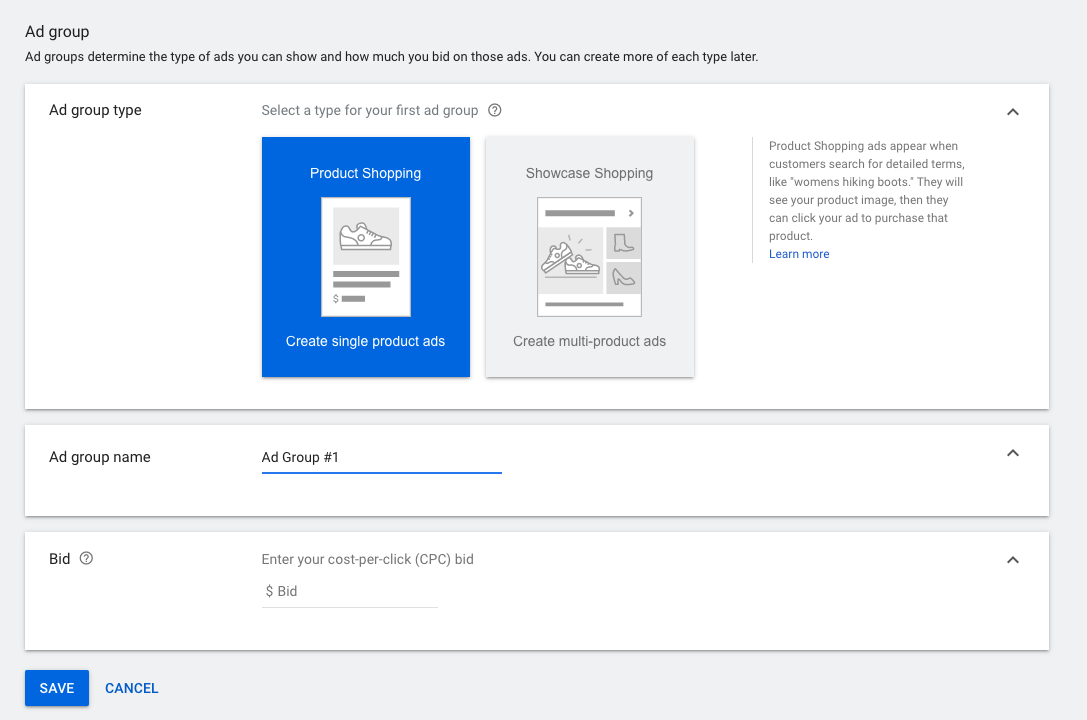
Creating an Ad Group
Step two of Google’s setup process consists of creating your ad group. Choose the “Product Shopping” option and name your ad group. Then set your bids. Remember, you will pay every time someone clicks on one of your Shopping ads, so set bids and a budget that will help you reach your business goals.
If you do decide after launching your campaign to segment out your ad group by brand, product type, category, a custom label, or any other type of organization that combines related products in your feed, go to the “Product groups” tab under that ad group and click on the pencil icon next to “All products.”

A window will appear where you can pick a form of subdivision before deciding which to include in your segmentation process. In the example below, we decided to break our products up by brand.
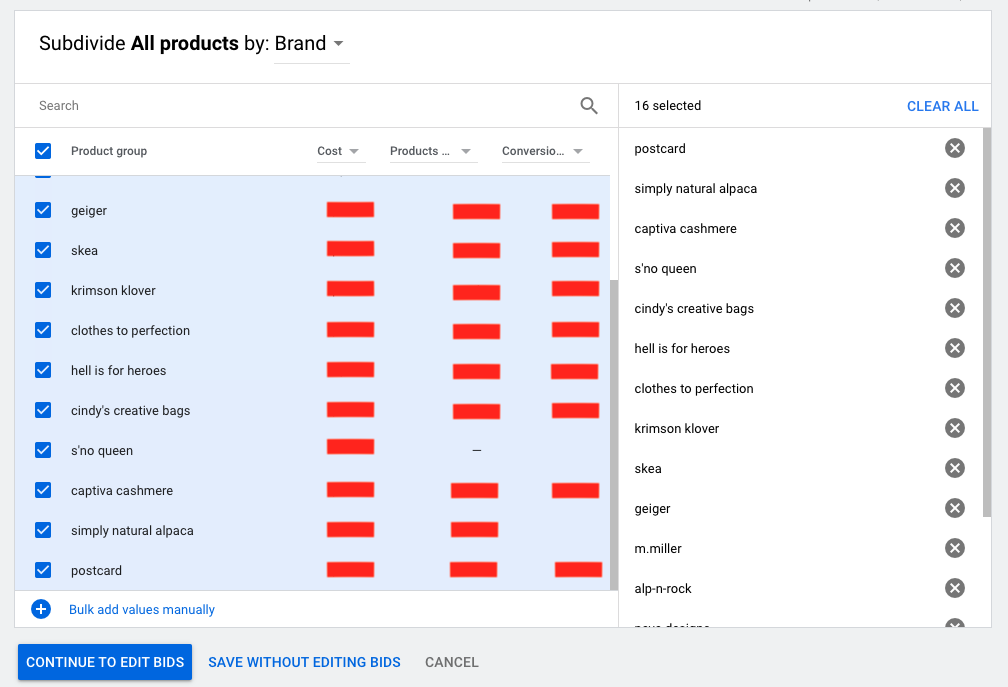
After dividing the products up by these brands, we can choose to divide even further to gain a more detailed outlook on the various metric performance of certain products.
Finishing Up
You have just completed your very own Google Shopping Campaign! If approved by Google, your products will now appear online in a format that shows searchers a product relevant to what they are looking for in a clear-cut, efficient way. Just like PPC ads, you will only pay when someone actually clicks on your ad. The Google Ads Help guide can further break down some important definitions and features of Google Ads. The Google Shopping Network provides a whole new world of search opportunities, and with the continued optimization of your campaign and the upkeep of Google’s best practices, your shopping campaign is on its journey towards success.


